
Chicken Cage Installation Checklist Before Equipment Arrival
Buying chicken cage equipment is only one part of a poultry farm project. Before the equipment arrives, the farm site should be ready for unloading, storage, installation, water connection, power connection, manure discharge, and daily operation.
For overseas buyers, good preparation can reduce installation delays, missing tools, layout problems, and extra labor cost. Whether you are installing A Type layer cages, H Type layer cages, automatic feeding, manure belt cleaning, egg collection, or ventilation equipment, the poultry house should be checked before shipment or arrival.
This article provides a practical checklist to help poultry farm owners prepare before chicken cage equipment arrives.
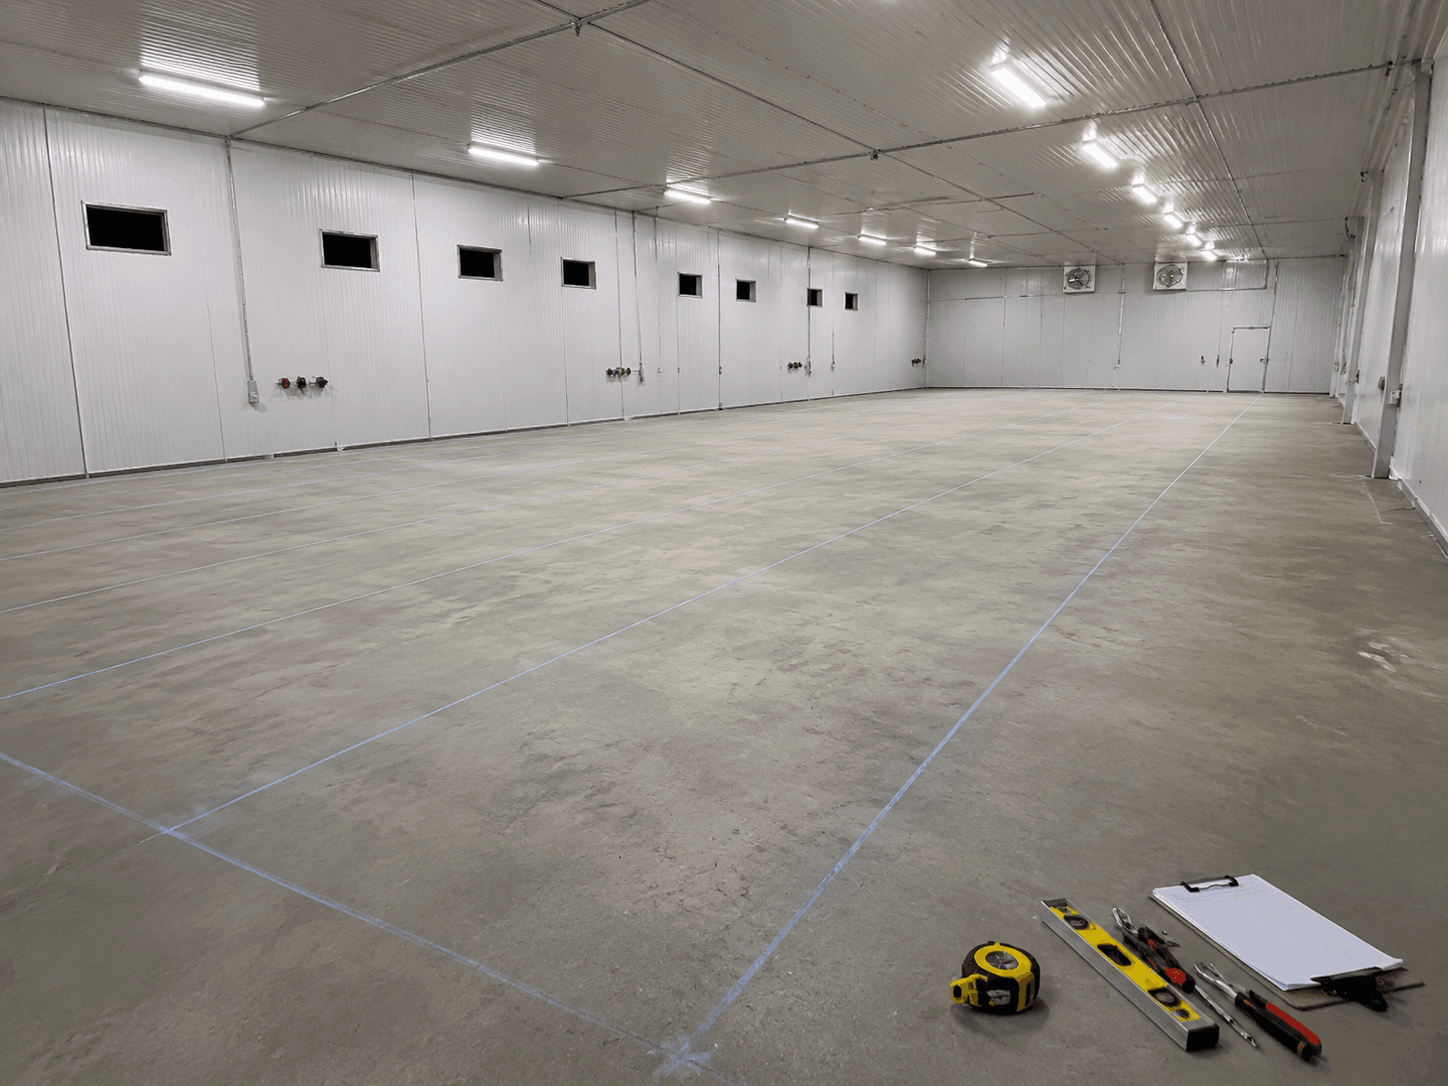
1. Confirm the Poultry House Size and Layout
Before equipment arrives, confirm that the poultry house size matches the cage layout.
You should check:
- House length
- House width
- Sidewall height
- Roof height
- Door position
- Column position
- Window position
- Floor level
- Space for aisles
- Space for equipment at the front and end of the house
If the house size is different from the drawing, the cage rows may not fit properly. The aisle may be too narrow, or there may not be enough space for feeding machines, manure belts, egg collection, or ventilation equipment.
Before installation, it is better to send updated house measurements and site photos to the supplier for checking.
2. Prepare a Flat and Strong Floor
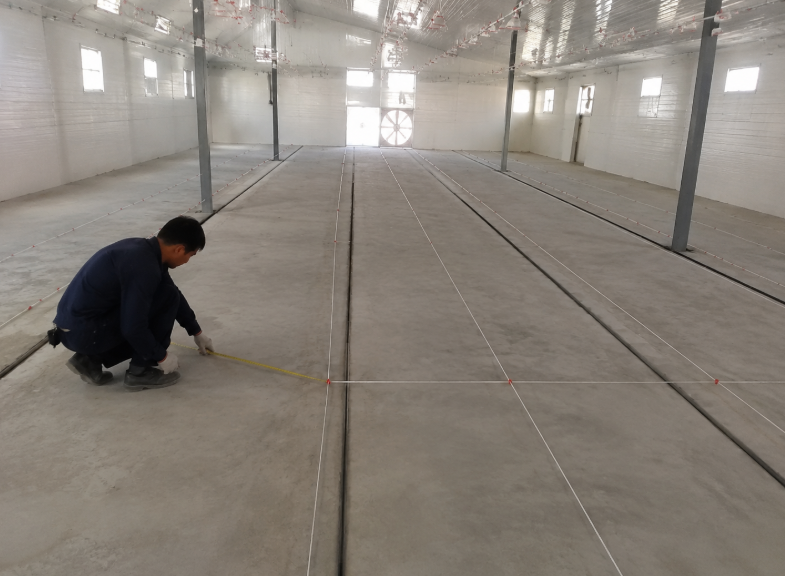
The floor condition is very important for chicken cage installation.
A poor floor may cause cage rows to be uneven, feeding equipment to run poorly, or manure belts to move incorrectly.
Before equipment arrival, check whether the floor is:
- Flat
- Dry
- Strong enough
- Clean
- Finished according to the project plan
- Free from large stones, holes, or construction waste
For H Type cage systems and automatic equipment, floor level is especially important. Uneven ground may affect the alignment of cages, feeding machines, manure belts, and egg collection systems.
If the floor is not ready, it is better to finish it before the equipment reaches the farm.
3. Check Water Supply Before Installation
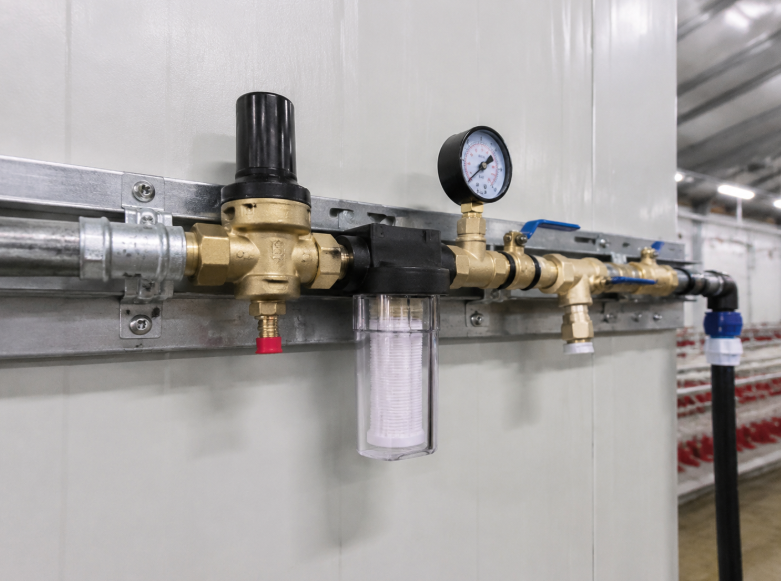
Layer cage systems usually include drinking lines, so water supply should be prepared before installation.
You should check:
- Water source
- Water pressure
- Water quality
- Main water pipe position
- Whether filters are needed
- Whether pressure regulators are needed
- Whether the water line can reach all cage rows
If water pressure is too high, nipple drinkers may leak. If pressure is too low, birds at the end of the line may not get enough water.
Water supply should be planned together with the cage layout, especially for long cage rows or H Type layer cage systems.
4. Check Power Supply and Electrical Points
Automatic poultry equipment needs stable electricity.
Before installation, confirm:
- Voltage
- Phase
- Power capacity
- Electrical control box position
- Cable route
- Grounding condition
- Whether a generator is available
- Whether local electrical installation meets safety requirements
If the farm uses feeding machines, manure belts, egg collection, fans, cooling pads, or controllers, power supply must be ready before testing the system.
5. Reserve Space for Feeding Equipment
If the farm uses automatic feeding equipment, the house should reserve enough space for the machine to move and operate.
Before installation, check:
- Cage row length
- Feeding machine running path
- Rail or track position
- Space at both ends of the cage rows
- Feed storage area
- Power connection for the feeding machine
- Whether the floor and cage rows are aligned
If feeding equipment is added after cage installation without enough space, the farm may need to adjust the layout or lose working space.
6. Plan Manure Discharge Direction
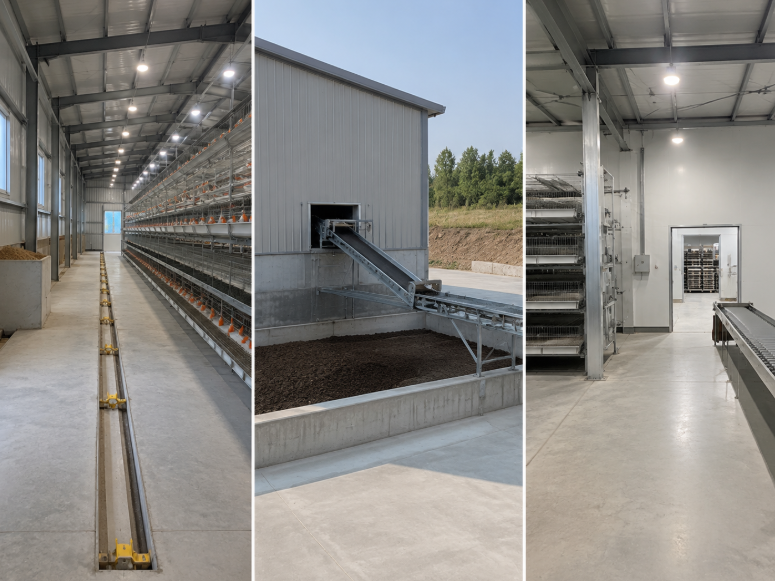
Manure cleaning should be planned before installation, not after the cages are already installed.
Before equipment arrives, confirm:
- Manual cleaning or manure belt cleaning
- Manure discharge direction
- Space for cross conveyor
- Exit position from the poultry house
- Outside manure pit or storage area
- Truck loading area, if needed
- Whether the ground outside the house is ready
For H Type layer cage systems, manure belt cleaning is commonly used. The discharge direction must match the house layout. If there is no clear manure exit, cleaning work may become difficult after installation.
7. Reserve Space for Egg Collection
If the project includes automatic egg collection, the front or end of the house should have enough space for the egg collection system.
Before installation, check:
- Egg collection direction
- Space for egg collection equipment
- Worker access area
- Connection to egg storage or packing area
- Whether the floor is clean and level
- Whether the system will connect to egg tray packing equipment later
For small farms, manual egg collection may be enough. But if the farm plans to add automatic egg collection later, space should be reserved from the beginning.
8. Check Ventilation and Cooling Positions
Cage layout and ventilation should work together.
Before installing cages, check where the following equipment will be installed:
- Exhaust fans
- Cooling pads
- Air inlets
- Curtains
- Temperature controller
- Lighting
- Sidewall openings
For closed houses or hot climate areas, ventilation design is very important. If cage rows block airflow, or if fans and cooling pads are not placed properly, birds may face heat stress and poor air quality.
Before equipment arrival, confirm whether ventilation equipment will be installed before, during, or after cage installation.
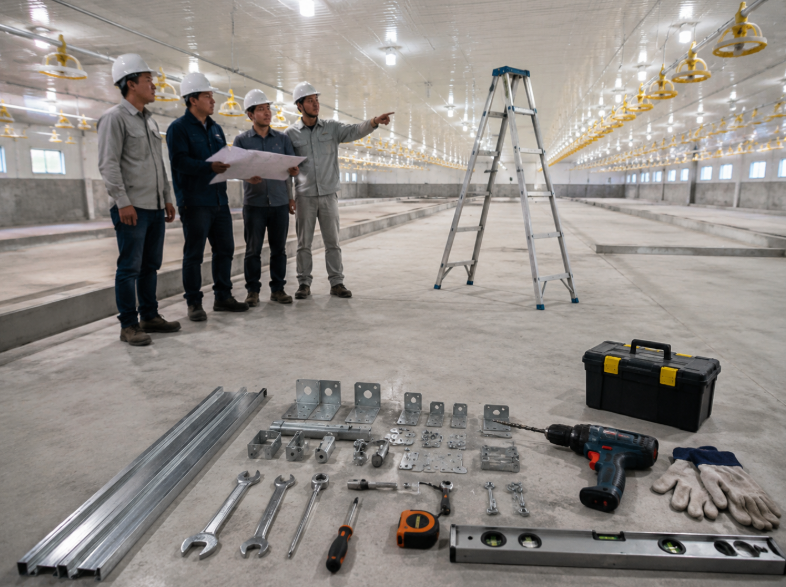
9. Prepare Tools and Workers
Chicken cage installation needs proper tools and enough workers.
Before equipment arrives, prepare:
- Wrenches
- Screwdrivers
- Electric drill
- Measuring tape
- Level tool
- Ladders or lifting tools
- Cutting tools, if needed
- Safety gloves
- Extension cables
- Lighting for indoor work
You should also arrange workers who can follow the installation drawing and keep parts organized.
For large projects, it is better to assign one person to communicate with the supplier and one person to manage on-site workers.
10. Prepare an Unloading and Storage Area
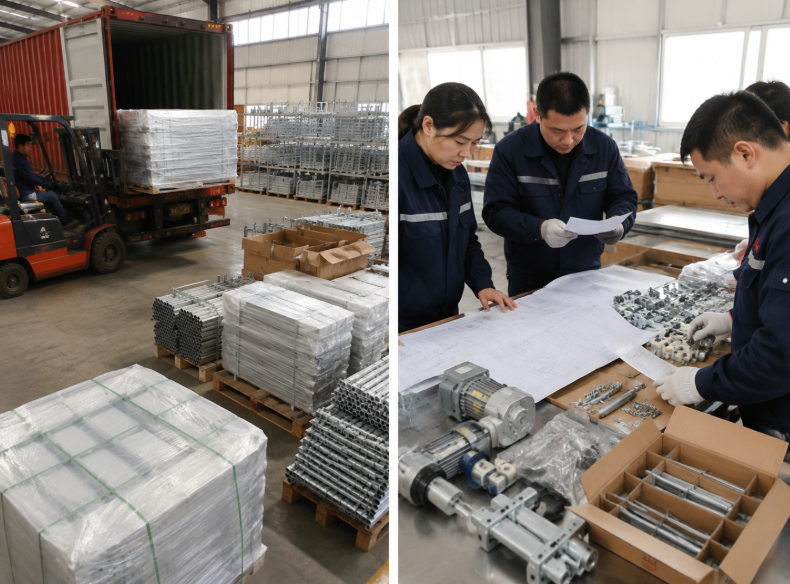
When the equipment arrives, the farm should have a clean and safe place for unloading and temporary storage.
Prepare:
- Space for container unloading
- Forklift or lifting equipment, if needed
- Dry storage area
- Protection from rain
- Separate area for small parts
- Labels or records for different parts
- Security to prevent parts from being lost
If parts are mixed or damaged during unloading, installation may be delayed. Small accessories, bolts, motors, belts, and drinking system parts should be stored carefully.
11. Check the Packing List and Drawings
Before installation starts, check the packing list and drawings.
You should confirm:
- All main cage parts are received
- Motors and electrical parts are complete
- Drinking line parts are complete
- Feeding system parts are complete
- Manure belt parts are complete
- Egg collection parts are complete
- Spare parts are separated and labeled
- Installation drawings are available
If anything is missing or damaged, contact the supplier as soon as possible.
A clear packing list can help workers find the correct parts faster during installation.
12. Send Site Photos to the Supplier Before Installation
For overseas projects, remote checking is very useful.
Before installation, send photos or videos of:
- Full poultry house inside view
- Floor condition
- House front and end
- Sidewalls
- Door position
- Water connection point
- Power connection point
- Manure discharge area
- Equipment storage area
This helps the supplier check whether the site is ready and give installation guidance before problems happen.
Final Checklist Before Equipment Arrival
| Item | What to Check |
|---|---|
| House size | Matches cage layout drawing |
| Floor | Flat, dry, strong, and clean |
| Water supply | Pressure, source, pipe position |
| Power supply | Voltage, phase, control box position |
| Feeding system | Space, track, power, feed storage |
| Manure cleaning | Discharge direction and outside handling |
| Egg collection | Collection space and worker access |
| Ventilation | Fan, cooling pad, air inlet positions |
| Tools | Basic installation tools prepared |
| Workers | Enough trained workers arranged |
| Storage area | Dry and safe place for equipment |
| Drawings | Installation drawings ready |
| Packing list | Parts checked after arrival |
| Site photos | Sent to supplier for confirmation |
Sample Message to Send Before Installation
You can send a message like this to the supplier:
Hello, our chicken cage equipment will arrive soon.
Poultry house size:
Floor condition:
Water supply position:
Power supply:
Manure discharge direction:
Feeding system space:
Egg collection space:
Ventilation equipment position:
Number of workers:
Tools prepared:
Site photos attached:
Please help us check whether the site is ready for installation.
This helps the supplier give better installation guidance and reduce delays.
Final Recommendation
Good installation preparation can save time, reduce mistakes, and help the poultry farm start operation more smoothly.
Before chicken cage equipment arrives, buyers should check the poultry house size, floor condition, water and power supply, manure discharge direction, feeding equipment space, egg collection area, ventilation layout, tools, workers, storage area, drawings, and packing list.
For A Type layer cages, the farm should pay attention to house width, aisles, manual operation space, and drinking line arrangement.
For H Type layer cages and automatic systems, the farm should pay more attention to floor level, power supply, manure belt layout, feeding machine space, egg collection direction, and ventilation design.
If you are preparing for chicken cage installation, send us your poultry house size, site photos, cage type, bird quantity, and automation requirements.
Want to know more?
Get in touch with us for more information about our services and products.