

Replacement Poultry Manure Belts: Measurements and Compatibility Checks Before Ordering
Ordering a replacement poultry manure belt takes more than matching its width. The new belt must suit the existing drive, rollers, tensioning arrangement, scraper and joining method. A belt that looks similar can still leave the farm with an unresolved installation or tracking problem.
For a layer farm replacing a damaged belt, the buying question is: what information will let the supplier confirm the correct replacement for this particular row and tier? Start with the equipment identity, establish how the dimensions are defined, and ask for a written compatibility decision before approving the order.
1. Identify Which Belt You Are Replacing
A poultry manure removal system can have several belt positions. The belt under a cage tier collects droppings along the row. A transverse conveyor receives manure at the row ends, while an inclined conveyor may carry it to an outside collection point. These are different replacement requests, even when all are described as “manure belts.”
Record the house, row, tier and exact belt position. Add the cage or conveyor manufacturer, model, installation year and serial number where available. Keep the drive-unit reference separate from the cage model. For the overall arrangement, see the belt manure removal system overview.
If the problem is repeated edge damage, slipping or sideways movement, include that history in the enquiry. Ask the technician to assess the belt path, rollers, scraper and tensioning arrangement before assuming a new belt alone will resolve it. The Chore-Time manure-drive manual treats belt joining, tension, roller contact and tracking as separate installation considerations. Its settings apply to its own equipment, rather than every poultry cage system.
Selection condition: identify the belt position and equipment configuration before comparing replacement offers. “For an H-type cage” is not a complete specification.
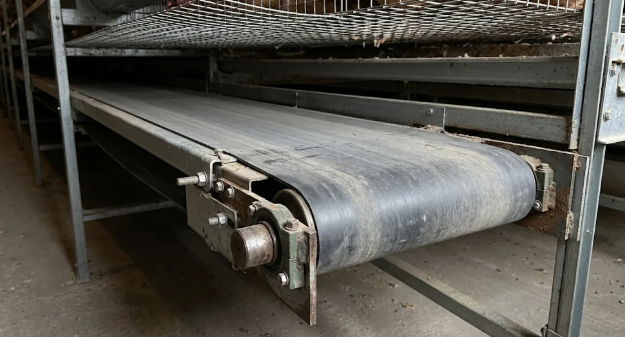
2. Confirm Width, Thickness and the Meaning of Length
Use the original part number, equipment drawing and belt specification as the starting point. Site measurements help verify those records; they should not silently replace missing design information.
| Item | Evidence to provide | What the supplier should confirm |
|---|---|---|
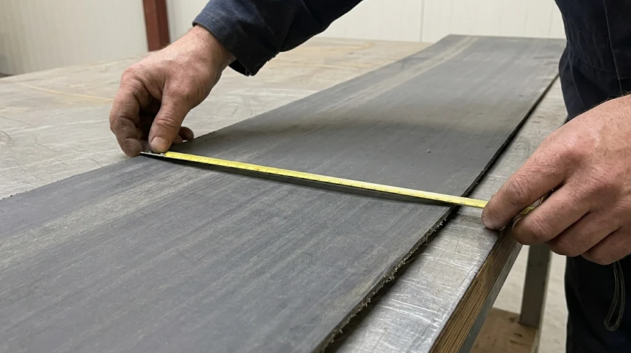
| Width | Original specification and accessible edge-to-edge measurements, with units and photographs | Required finished width, tolerance and clearance within the existing belt path |
| Thickness | Original specification; condition and location of any old-belt measurement | Required nominal thickness and tolerance for the proposed material and drive arrangement |
| Length | Drawing, belt route, measurement method and current tensioner position | Whether the quotation states supplied cut length, finished loop length or another defined dimension |
| Quantity | Separate row-and-tier list identifying each belt | Number of pieces or rolls and the destination of each one |
The worn or damaged parts cannot determine the original nominal thickness. Similarly, without explanation, stretched, repaired, or torn old belts may not provide reliable order lengths. Mark the measurement as on-site observation and determine its limitations.
For an endless tier belt, house length or cage-row length is not the complete loop length. The route also includes the return run and the path around the end rollers. The supplier must account for the actual arrangement, joining method and tensioning allowance when confirming the order dimension. Do not add an assumed percentage or copy an allowance from another farm.
Have qualified personnel collect measurement values according to the isolation procedures of the equipment. If the size cannot be safely obtained, please mark it as' not measured 'and request a drawing or agreed upon inspection method.
Selection condition: do not release an order while “belt length” means different things to the buyer and supplier, or while a critical dimension has no agreed basis.
3. Specify the Material and How the Ends Will Be Joined
If the existing paperwork identifies a PP manure belt or a PVC belt, include the full specification rather than the polymer name alone. Request the proposed material designation, construction and relevant technical data. Do not select a replacement by colour or assume a thicker belt is automatically a suitable upgrade.
Tell the supplier about the operating environment, cleaning products and any documented temperature requirements. Ask it to confirm suitability for those conditions and for the retained drive, roller and scraper arrangement. If the original belt material is unknown, provide the available records and ask what additional identification is needed.
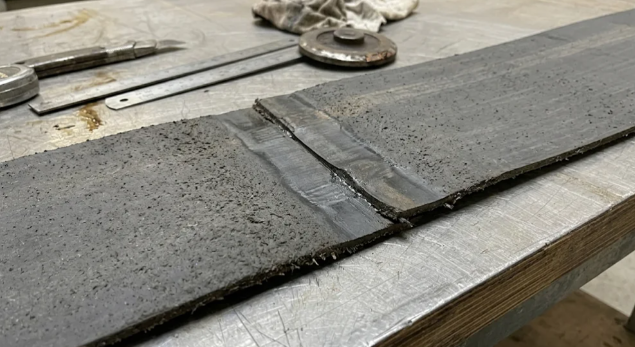
The quotation must also explain the delivery form: an open length for joining on site or a finished endless belt, where the equipment permits it. Ask who will prepare the ends, make the joint and inspect the result, and whether tools or specialist services are included.
The Chore-Time manual, for example, specifies a particular overlap orientation and sonic-welding arrangement for its system. This illustrates why the belt joint must be specified for the equipment. It is not a universal welding instruction for replacement manure belts. Use the joining procedure approved for the selected belt and equipment; do not transfer overlap dimensions or welding settings from an unrelated manual.
Selection condition: hold the order if the material is unidentified, the joining method is unresolved or nobody has accepted responsibility for the site joint.
4. Check Compatibility Beyond Belt Dimensions
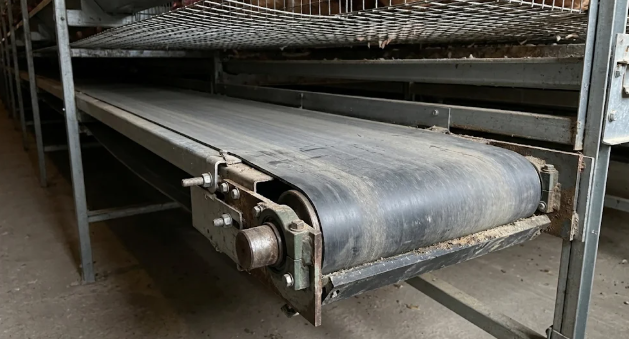
Send an overview of the drive end and return end, plus photographs of accessible component labels and the existing joint. Ask the supplier to review these interfaces together:
- Drive and rollers: drive method, roller dimensions and surface condition, and any pressure or snub-roller arrangement.
- Tensioning: Explain the tensioner type, current position, and available adjustments according to the equipment instructions.
- Belt path: the position of support, guidance, clearance, and friction or deviation of the old belt.
- Scraper: blade type, condition and contact arrangement, including clearance for the proposed joint.
Keep these checks specific to the installed system. Big Dutchman's AMBA product information, for example, describes sensors and a motor that adjust belt tracking. Such equipment needs to be identified during a replacement review; its presence cannot be inferred from the cage type.
For a cross-brand manure belt replacement, ask for written confirmation identifying the exact equipment reviewed and any required changes. Equal width and thickness alone do not establish compatibility. If the supplier cannot identify the configuration from the submitted information, resolve the missing evidence before treating the offer as a confirmed fit.
5. Send One Replacement-Belt Enquiry Sheet
Use one line for each distinct belt specification. Several tiers that look alike should not be grouped together until their records have been checked.
| Enquiry field | Information to include |
|---|---|
| Equipment and location | Manufacturer, model, drive reference, house, row, tier and belt position |
| Existing part | Part number, drawing reference and original material specification, if available |
| Dimensions | Width, thickness and length, with units, evidence and measurement limitations |
| Joint and delivery form | Existing joint photographs; requested open length or finished loop, subject to equipment review |
| Interfaces | Drive, rollers, tensioner, supports, guides and scraper information |
| Reason for replacement | Damage location, tracking or slipping observations, previous repairs and relevant service records |
| Quantity and destination | Pieces or rolls by specification, installation location and delivery address |
| Site work | Available work window, installation responsibility and joining equipment or service required |
Mark missing information as “unknown.” Ask the supplier to return the sheet with its proposed specification, supporting drawing or part reference, compatibility conditions and unresolved questions. This is more useful than a price against an unqualified description such as “standard poultry manure belt.”
Keep this request with the farm's layer cage spare-parts records, so later orders can refer to the approved replacement rather than repeat the identification process.
6. Compare the Complete Replacement Scope
Compare quotations only after the proposed belt specification and supplied quantity are clear. Confirm whether the price is per metre, roll or completed belt, and distinguish supplied length from finished loop length.
Check whether each offer includes joint preparation, joining tools or services, packing, transport and installation. Record any separately required rollers, scraper parts or other corrective work. Obtain the actual lead time, minimum order quantity and warranty terms for the quoted item, including any conditions affecting retained equipment.
Before installation, agree how the replacement will be checked against the approved specification and equipment instructions. The responsible technician should define the checks for the joint, tracking, tension, scraper contact and manure transfer under agreed test conditions. Retain the results and final part identification in the equipment handover record.
The next step is to assemble the equipment references, dimension sheet, photographs and replacement history. Send them through the Auto ChickenCage contact page, identify which belt needs replacing, and ask whether a suitable replacement can be offered. Request written confirmation of the proposed specification, fit conditions, joining responsibility and quotation scope before placing an order.
Want to know more?
Get in touch with us for more information about our services and products.